More updates to 4shared: managing your folders becomes even more convenient
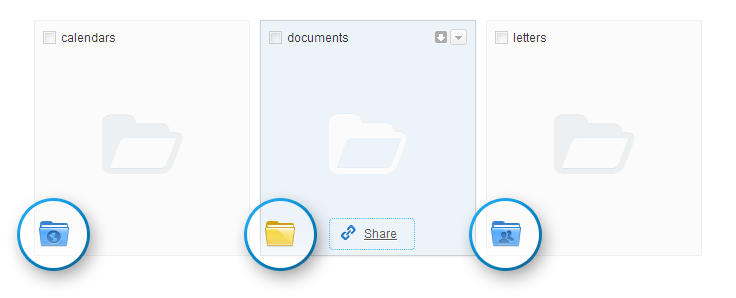
First of all, let’s talk about folders you host on 4shared and how you can manage them. As you know you can change the status of your folder:
✔ make it private, so nobody can access it;
✔ invite members to access the folder;
✔ make it accessible for everyone.
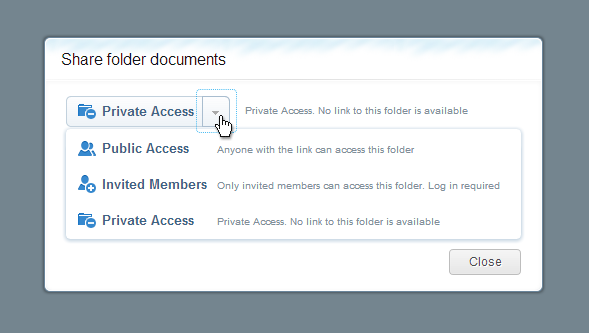
Find a folder you need and click “Share” button to reach the available options:

So, if you want to set private access to your folder, choose “Private access” by clicking on the arrow, and click “Save”:

If you set Private access to your folder, you should know that it means that you won’t be able to share links to this folder and nobody except you will access it. You can do the same if you want to change the access type to the folder.

Imagine that you held a great party last night, and now you want to share photos with friends. Create a new folder and upload all photos to your 4shared on web. Yeah, even those you’re ashamed of:). Set Public Access to this folder.
Well, now when this folder is accessible to everyone, you can set public permissions to it:
1. Click “Share” on the folder
2. Click on “links” tab
3. Choose the type of permission for your friends to this folder: View only, or Upload&Edit

• If you choose “View only”, your friends will be able to preview your photos and download them.
• If you choose “Upload&Edit”, they are free to change your folder by uploading/deleting their files to it, or editing your files. It’s very useful for collaborative work within one folder.
But don’t think that we’ve forgotten about your scandal photos from the party:). You can hide them, even if your folder is accessible for everybody. Isn’t it awesome?! Follow the instructions to save your reputation:
1. Choose that “secret” file, which is going to be hidden
2. Right click on it
3. Go to Properties
4. Put a checkmark near “Make this file private”
5. Don’t forget to click on “Save & Close”

What’s more? If you have a blog you can share the widget to your folder on 4shared so that everybody can preview your files and maybe download them!
1. Click “Share” on the folder
2. Click on “Embed” tab
3. Choose Widget tab to get the link
Put this link into your blog so that everyone could have the access to the stuff you want to share.

For example, you can see our Widget and choose a file you want to download:
CREATE YOUR OWN SUBDOMAIN
The unique subdomain will make your folder even more exclusive.
1. Click “Share” on the folder
2. Click on “More options” tab
3. Choose Subdomain tab to get the link
4. Fill in the name
5. Click Apply

Check this one for example: http://MayCalendar2013.4shared.com
AND the last feature… Are you ready?
You can add the descriptions to your folder to make it very special and unique.
1. Right click on the folder
2. Go to properties
3. And add some piece of description if you want

So, we hope you enjoy these updates and find them extremely useful. Remember to share your content and new info with friends. And get ready for mega-brand-new features we are working on right now. Look through your favorite music tracks, because 4shared has a big surprise for you:). Maybe we’ll make an awesome built-in player? Stay with 4shared to find it out.


June 10, 2013 at 10:22 am (#)
Does picture dimension scaling use aspect ratio (e.g. setting only the height and the width doesn’t stay the same but scaled accordingly)?
June 10, 2013 at 10:48 am (#)
How can I convert all my songs to a kbps of 192 or higher?
June 26, 2013 at 2:42 am (#)
Cool ,love this features ,cant wait to try them ,so see you Im going to my account. Cheers!
🙂
June 26, 2013 at 11:40 pm (#)
I think this is a really cool idea, now I am going to have to go to the website and check it out and make my own folder because I have a shitload of stuff to share and I have not shared it as of yet, LOL..Love ya all Vince..!!
July 1, 2013 at 1:40 pm (#)
Its great and more benefit to provide the convenient. I like its can share with others and save files in my folder.